From our commitment to animal husbandry to our on-farm cookouts, we at JSF invite you to be a part of our farm community.

From our commitment to animal husbandry to our on-farm cookouts, we at JSF invite you to be a part of our farm community.
Join chef Doug Paine and the rest of the Juniper crew with a JSF Dinner at the Farm!
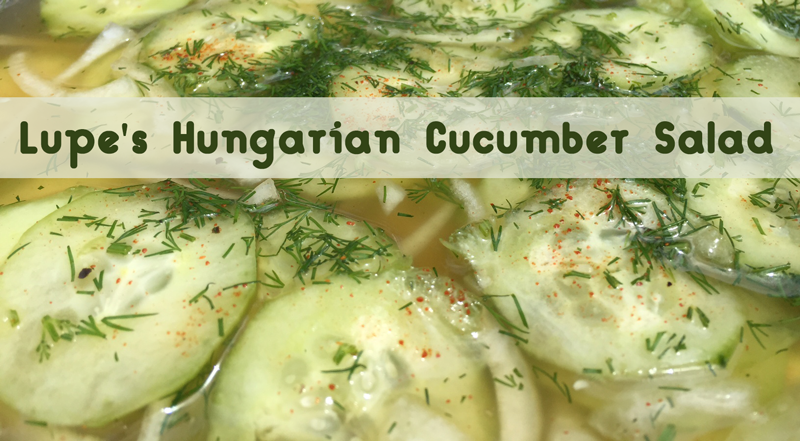
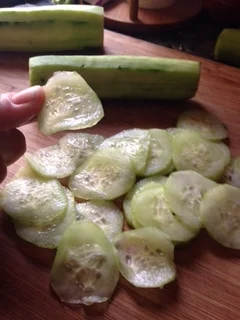
Peel and slice 2 cucumbers paper thin, so they are limp, use a veggie slicer or mandolin on the thinnest setting.
Place sliced cucumbers in a shallow dish in an even layer.
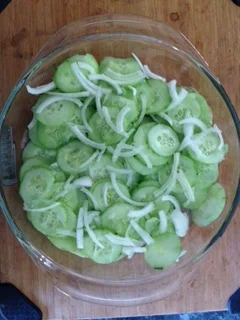
Pour Hungarian dressing over and marinate at least one hour, but for best flavor marinate overnight.
Sprinkle with a handful of chopped dill.
Salt and pepper to taste.
I love to add some paprika as well, just because I am Hungarian and that's what we do.
HUNGARIAN DRESSING
1/2 cup vinegar ( I use apple cider vinegar)
1/2 cup water
1 tablespoon sugar
1/2 teaspoon salt
dash of black pepper
Blend all ingredients together and pour over cucumbers, the longer they sit, the better they taste.
For a variation, you may add thin sliced sweet onions and marinate with the cucumbers.
Enjoy!
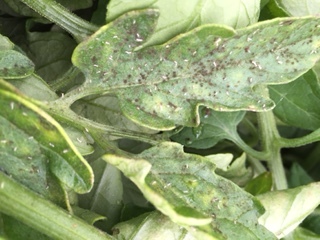
What's wrong with aphids? They feed on and stress leafy plants like tomatoes, spinach, and zucchini. Their feeding weakens the plants and makes it difficult for the plants to produce well all season long.
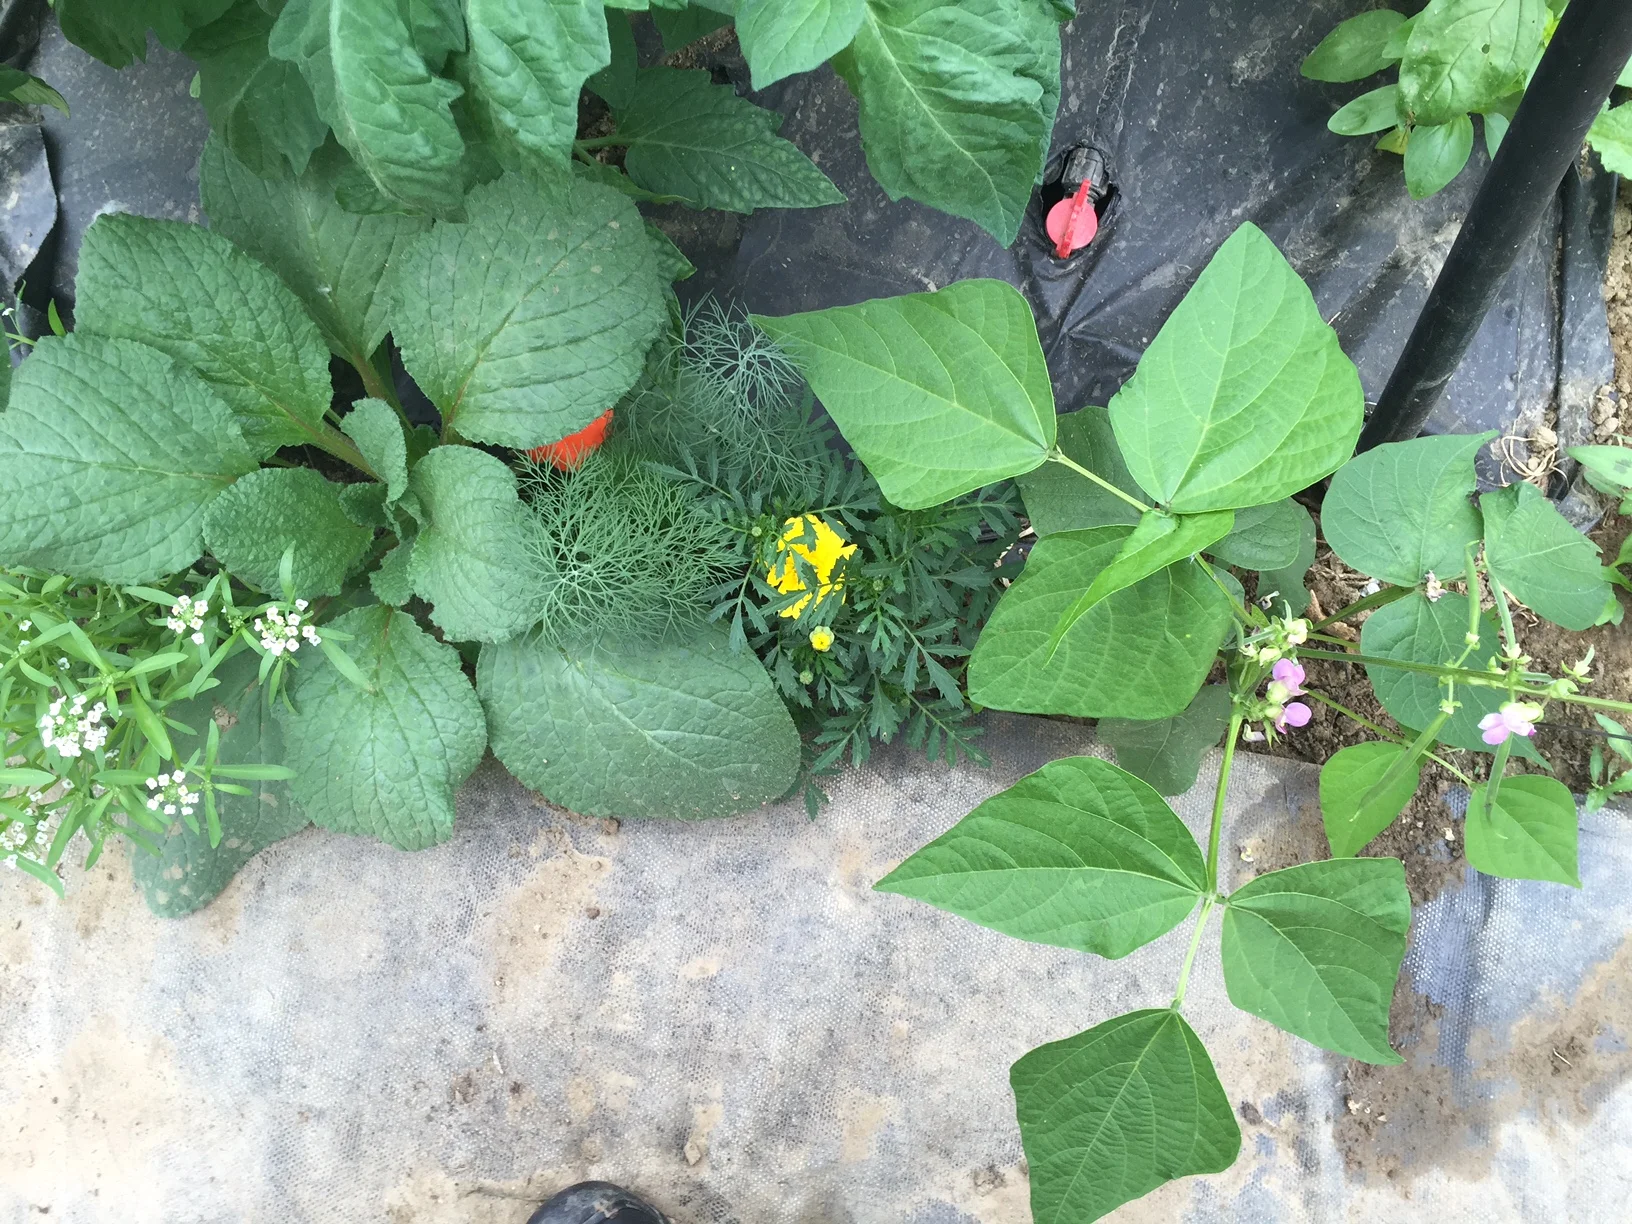
Last August we presented a blog post about the UVM Entomology Research Lab's on-farm investigation into whether “habitat plants” can sustain predatory insect populations to assist in keeping the aphid population low in our hoophouses. We planted habitat plants at intervals among the tomato plants in one of our heated hoophouses. Each type of habitat plant had a purpose of either providing food, shelter, or reproductive sites for beneficial predatory insects.
Read the full blog for fascinating detail about the types of pests and predatory insects we catalogued last year.
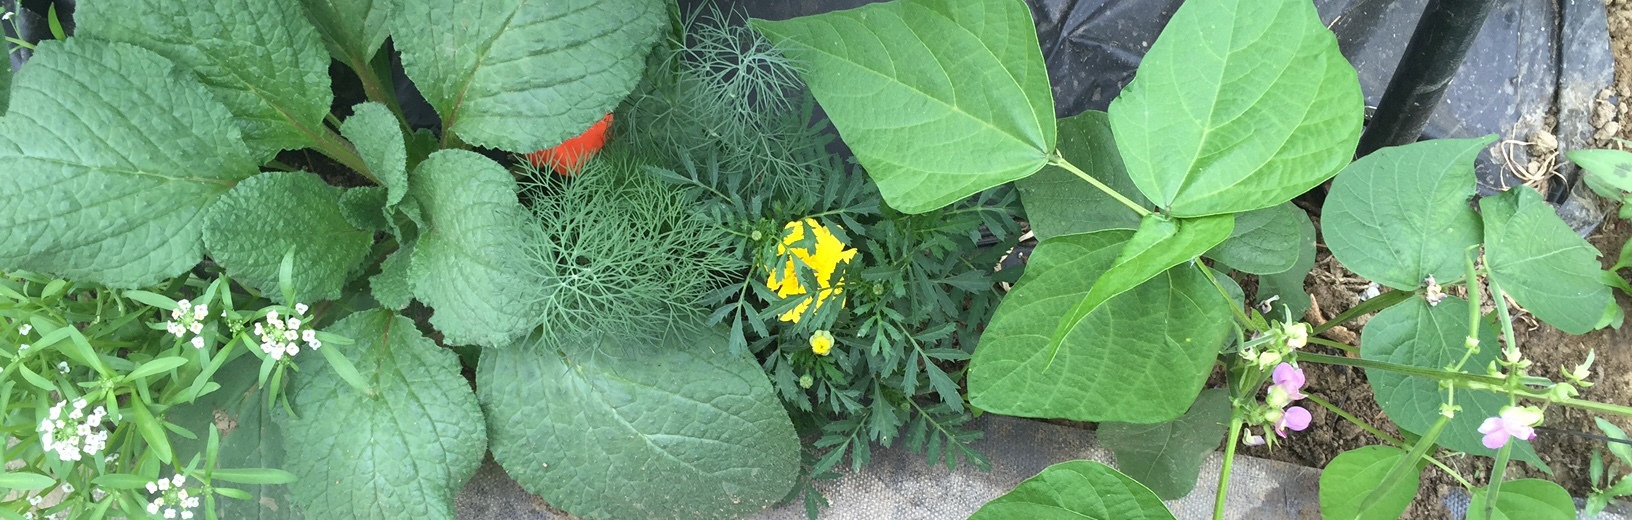
We establish habitat plants consisting of beans, alyssum, borage, marigolds and dill. Last year we found that borage, alyssum and dill attracted the highest diversity of insects, including pests. These pests in turn attracted beneficial insects which preyed on the pests and relied on the habitat plants to host a consistent food source for the season. Once in the hoophouse the predatory insects move throughout the plants, finding and preying on aphids throughout the hoophouse crops, thus helping to keep pests such as aphids at tolerable levels for the plants. Already this season Hannah has seen a good volume and diversity of predatory insects present to help control the aphids.
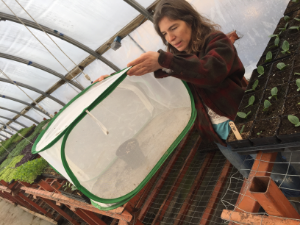
Juliette, our Greenhouse Manager, with a newly seeded "banker plant" before it was transplanted into hoophouse
In a second hoophouse we are trying another method of aphid control. We transplant a succession of “banker plants”, which are bunches of winter wheat grass purposefully "infected" with a type of aphid that is tasty to predatory insects but that does not feed on tomatoes or other vegetable crops (it feeds specifically on wheat grass and a few related plants). The purpose of the banker plant is to sustain the "good aphids" so they can be a consistent food source for predatory insects that feed on all types of aphids. This way when the bad aphids show up in the hoophouse to feed on the tomato leaves, there is an established predatory insect population that preys on and controls the aphids.
Why go through the trouble? We want to grow vigorous, healthy tomato plants and other crops in our hoophouses all season long without having to rely on chemical controls that can be unhealthy for us, for you, and for the many good insects and small animals that inhabit our farm. Plus it's simply amazing to learn about and watch all the different insects!

My favorite way to cook parsnips is to braise them. A little balsamic vinegar balances the sweetness of parsnips pretty well. Nice side dish, along with some fresh JSF greens.
~ 2 lbs of parsnips, peeled, sliced thinly
1/2 cup chicken broth or vegetable stock
1/4 cup balsamic vinegar
1/8 cup olive oil
splash of soy sauce
spices! (I like adding aleppo. I bet it would be good with ginger. Or how 'bout GREEN SHALLOTS!? Whatever you like!)
Put it all in a heavy skillet or cast-iron pan. Bring the liquid to a boil, then simmer until parsnips are soft and liquid has made a yummy glaze.
-Hannah Harwood Doyle
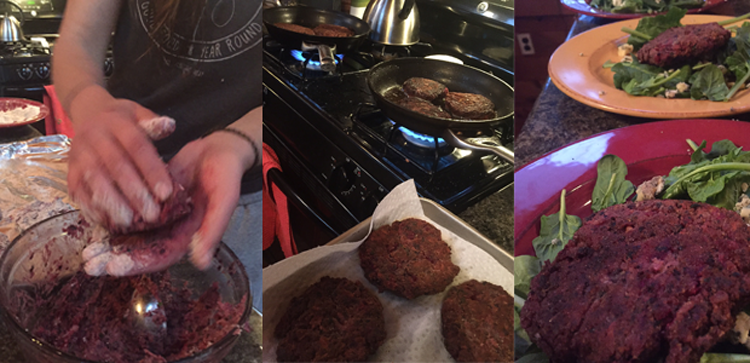
Once upon a time I dreamed of constructing a veggie burger that was strong enough to withstand the grill without crumbling to pieces. Those days are over, now I commit to the stove top and focus on FLAVOR.
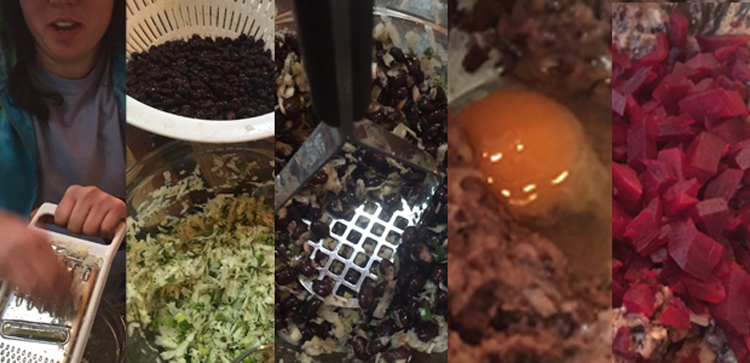
24 ounces of cooked Black Beans (2 cans)
3 Medium Size Beets (or 1 gigantor)
1/4 Cup of Flax Seed
1 Egg
1 Bunch of Green Garlic
4 Carrots
Bring a pot of water to a boil and add the beets. If you have a large beet, cut it into pieces to reduce cooking time. No need to peel. Cook until fork tender, about 30 minutes. Pour the beets into a colander. Run the beets under a trickle of cool water and the skins should slide off in your hand with gentle pressure.
While the beets are boiling grate the carrots into a large bowl. Add finely chopped green garlic. Rinse the black beans well so they are as dry as possible. Add them to the bowl and mash with a potato masher. You can also just put all 3 of these ingredients in a food processor and press GO.
You can flavor this paste with whatever you like. This week I used the juice of 1 lemon, savory, oregano, basil, and salt. After stirring well this is a great time to take a break, and taste! It's a great dip for a chip or veggie!
Add the flax seed and one egg, stir well.
Dice your cooked, peeled beets into small pieces and stir into the bean mixture. At this point add just a small amount of flour (any grain flour will do, or more flax seed if you prefer), to thicken the paste. You want it to be sticky.
Prepare a bowl of half flour and half bread crumbs. (You can sub in any grain or seed that will fry in high heat). Roll the veggie burgers into balls, flatten them, and dip them on both sides into the flour mixture. Then cook on medium high heat with canola (or other high heat) oil. Cook about 2 minutes per side, until browned and crispy.
I ate mine over a bed of spinach and blue cheese.

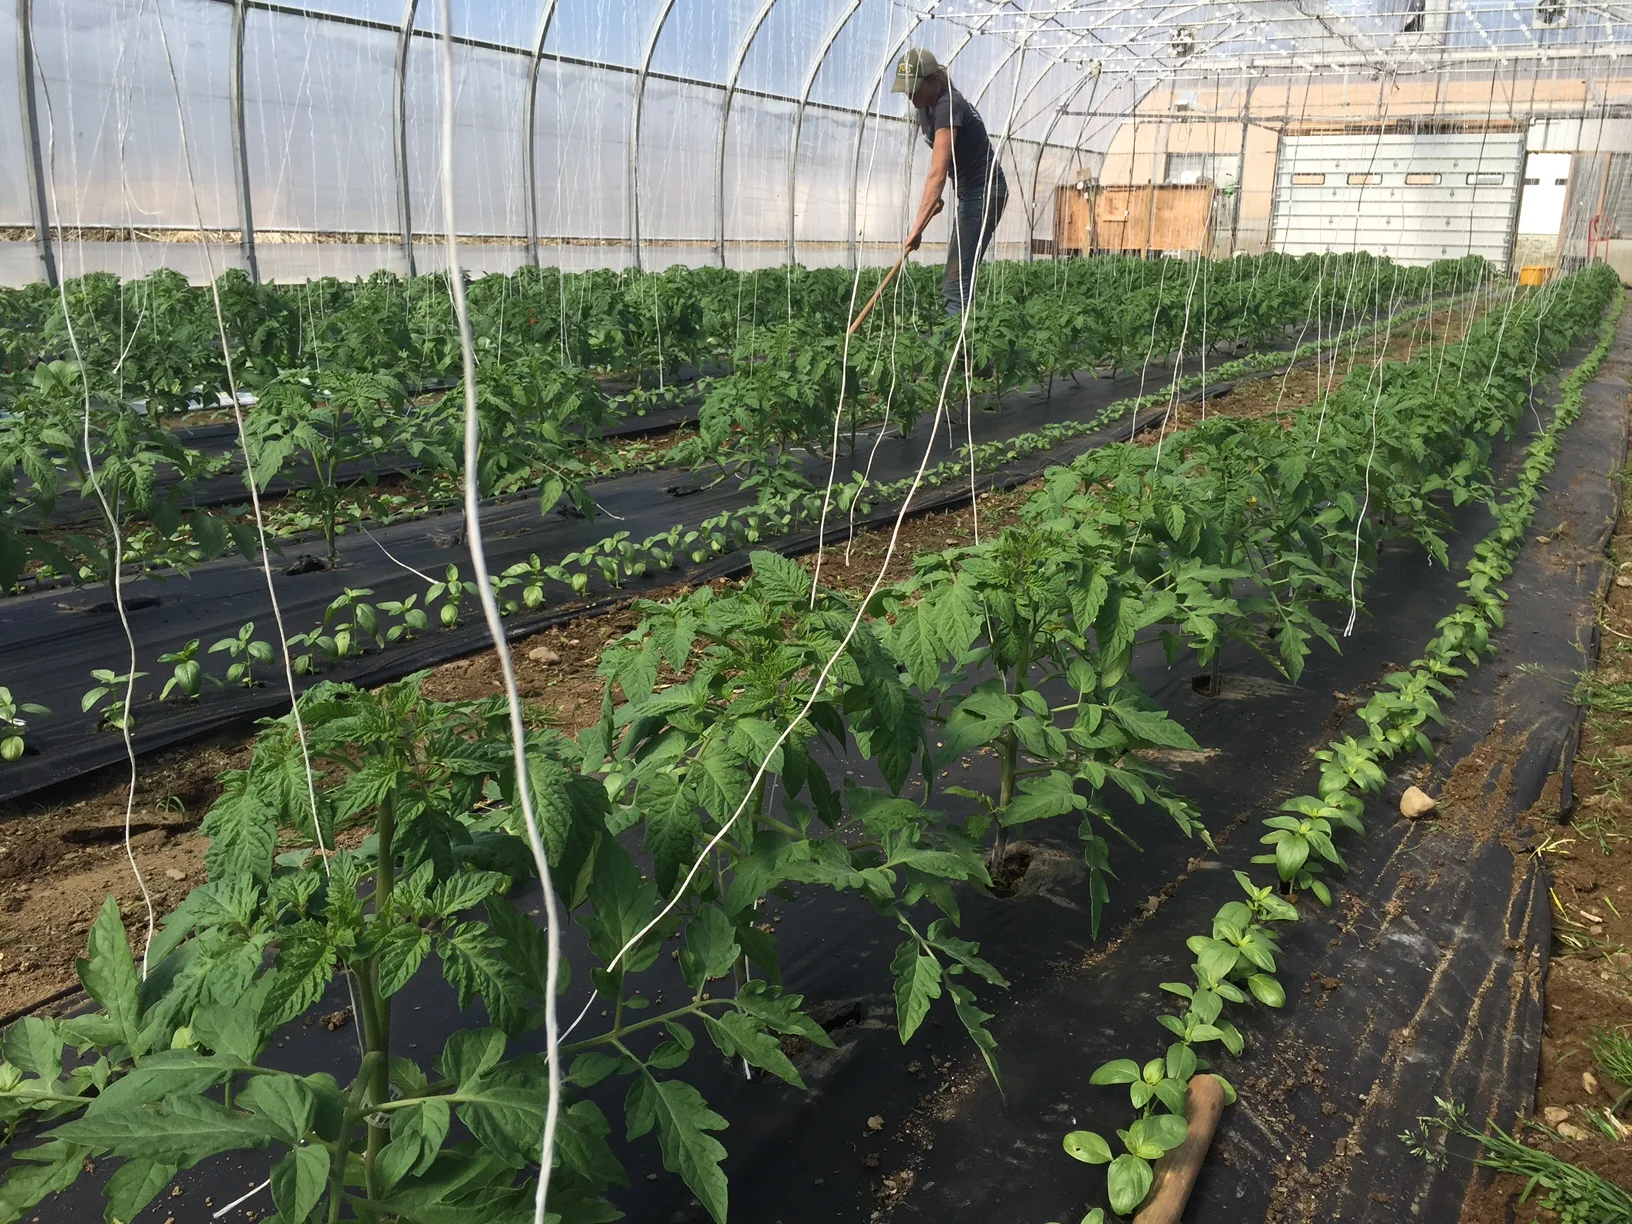
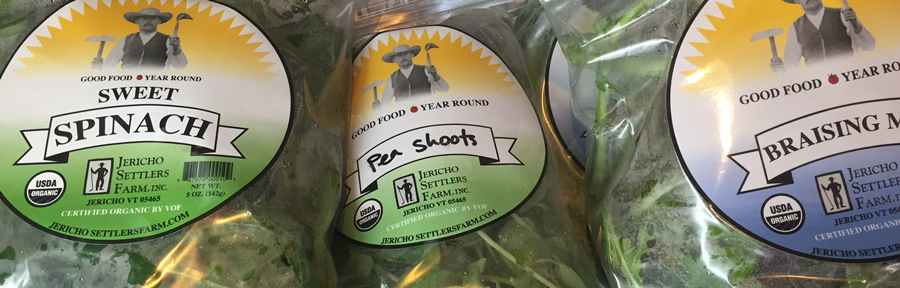
Many of our CSA members have been telling us how excited they are to have so many greens this time of year! We have been expanding our winter growing operation, and every year we are able to provide more variety of crops for a longer period of time. So how do we do it?
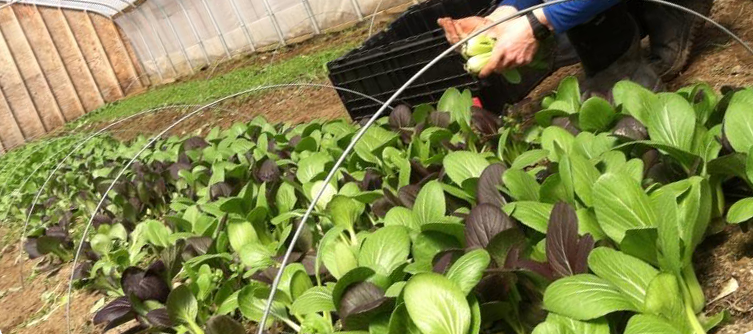
It all starts with careful planning in August, when we seed the transplants that we will eventually plant into the hoophouses in fall. When we finally pull our tomato plants from their indoor homes in September, we then fill the hoophouses with new transplants and seeds that will turn into crops such as mesclun, arugula, pac choi, spinach, kale, lettuce, chard and more. We allow our plants to grow until they are well-established, despite the waning daylength of fall. The short days and cool nights facilitate slow growth, but enough growth to secure a foundation of strong roots and rugged greens. The slow plant cell growth during the winter is responsible for the unbelievable sweetness and hardiness of winter-grown greens.
During the winter we cover our crops with “remay”, which is a long sheet of breathable fabric that is also penetrable by light. Remay prevents frost from touching the leaves, and increases the temperature of the soil beneath its cover. The hoophouses themselves get very warm when it is sunny, so we pull the fabric off during the day, and tuck the plants back in at night. This year we were able to over-winter spinach, kale, braising greens, chard, pac choi, tatsoi, green onions, and green garlic. You might think that was only because this winter was so mild, but we overwintered all these same crops last winter too when it was significantly colder.
When Spring arrives, and the days lengthen, the greens start growing rapidly. We harvest them either by hand, or with our walk-behind harvester, which allows us to harvest hundreds of pounds of salad greens per hour. We then bring the greens into our wash-pack area, where we double wash and sanitize them and spin them dry in a giant 50 gallon salad spinner. From there we put them into in our large walk-in coolers to cool them before sale.
We distribute our greens to our CSA members, our Farmstand, the Burlington Farmers Market, and numerous restaurants, groceries, hospitals and schools within 30 miles of the farm. We have nine hoophouses with nearly 40,000 square feet of growing space, allowing us to grow nearly 10000 pounds of salad greens between November and March.
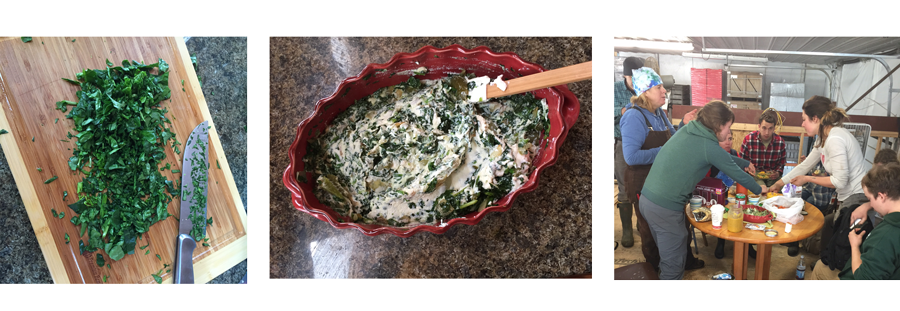
We welcomed newcomer Ian Doig to our team just before his April birthday! In honor of his day the whole team made chips and dips to share. Here is our favorite Spring Greens treat.
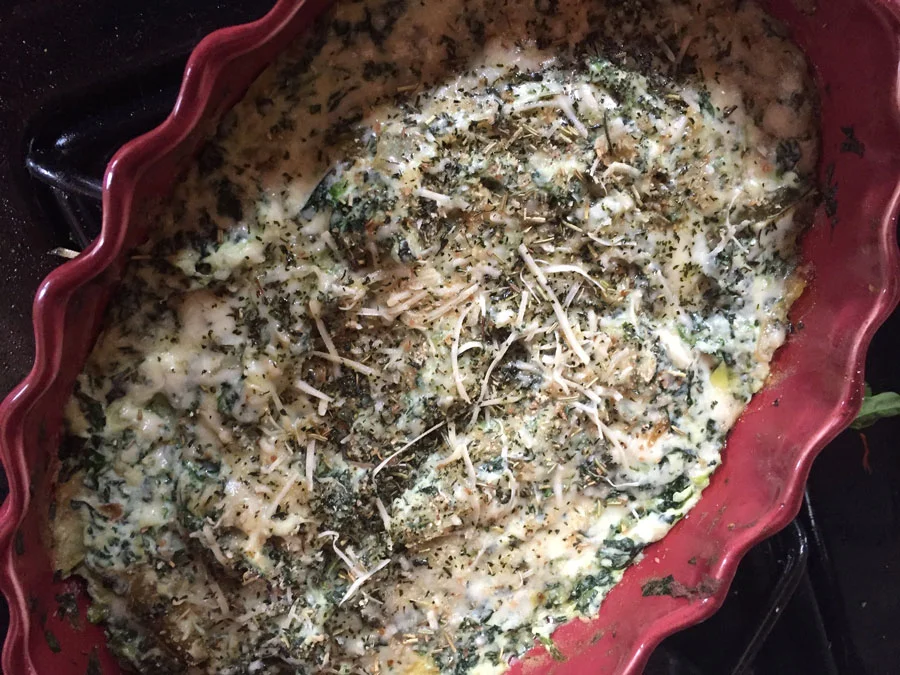
Spinach Dip by Diane Abruzzini
1 lb Spinach, or other greens
2 Small Yellow Onions
1 Bunch of Green Garlic
1 Pint of Ricotta Cheese
Caramelize the yellow onions in a bit of butter or oil. The onions should cook down in size, brown slightly, but not char. This should take about 30 minutes. From there add the chopped green garlic and cook for another 5 minutes, until the garlic is soft and tender. At the last minute add the Spinach.
I like to leave this dip chunky. Slowly fold in the ricotta cheese with the spinach mixture. At this stage add any herbs, salt, pepper, or other flavorings you like. This week I added salt, rosemary, thyme and savory. Once the cheese is folded in you can spoon the mixture into a baking dish. Top with parmesean cheese and bake at 350 F for 15 minutes.
Root Veggie Chips
Root veggie chips don't have quite the crunch of a potato chip, but once you learn to let that go you'll find a deep love for veggie chips! If you use a mandolin slicer you will get the most crunch, but thinly sliced chips can burn quickly, so keep your eye on the oven!
Preheat the oven to 375 F
Try flavoring the chips with herbs or cayenne pepper before baking. Find the best flavor combination and let us know!
Carrot Slaw is one of my favorite Spring treats, because I can mix in the sweet and spicy microgreens.
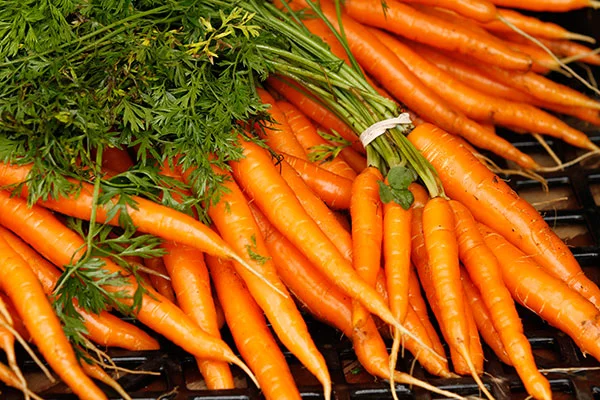
CARROT SLAW
Dressing:
3 TBSP Apple Cider Vinegar
3 TSBP Maple Syrup
3 TSBP Soy Sauce
1 tsp Sriracha or Hot Chili Sauce (add more or less depending on affinity to spice)
1 TBSP Sesame Seeds
Grate, food process, or julienne 2 lbs of carrots. You can sub in other root veggies, or cabbage, based on availablity. Toss in salad dressing, and let sit in fridge for 30 minutes before serving. When ready to serve, top with microgreens!
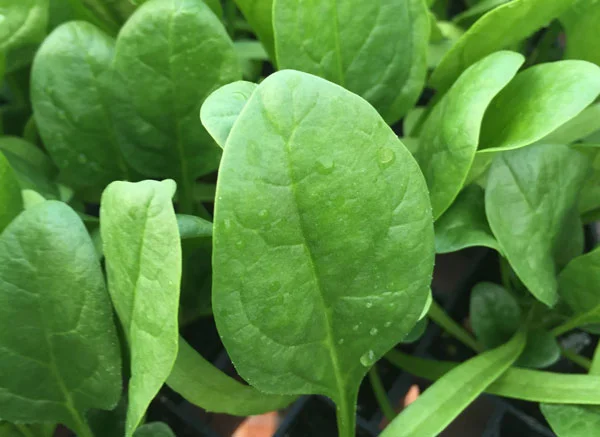
SPINACH PESTO
My favorite way to use Spinach Pesto is spread on toast, and topped with a sunny side up JSF egg. I have found a multitude of uses for it, and have spiced it up in a million different ways. I have tossed it in pasta stir-fries, marinated and baked chicken in it, used it as a sandwich spread, and snacked on carrots dipped in it.
SPINACH PESTO
1/2 lb, or one large bag, of Spinach
1/2 of one Onion
2 Cloves Garlic
1/2 tsp Red Pepper Flakes
1/2 tsp Salt
1/2 tsp Pepper
1/4 Walnuts
Olive Oil
Sautee on low the half onion, salt, and pepper, in enough olive oil to coat the pan. For the best pesto flavor, you will want to caramelize the onion, which will take about 30 minutes. The onions should become transluscent, and then slightly browned, but not burnt, so keep stirring!
About 5-10 minutes before the onions are done, add the chopped garlic and red pepper flakes.
Put spinach and walnuts in the food processer or blender. Add the onion and oil mixture, and pulse until the oil is distributed. The mixture should be chunky. at this point, slowly continue to add fresh olive oil until you reach the consistency that works best for you. I like to keep mine fairly chunky, because I like to spread it on toast. When I use it as a pasta sauce or a dip, I use enough oil to be able to drip the pesto off of a spoon.