Viewing entries in
Recipes

Perfect Pork Chops

Comment

Perfect Pork Chops

PigsInAutumn.jpg

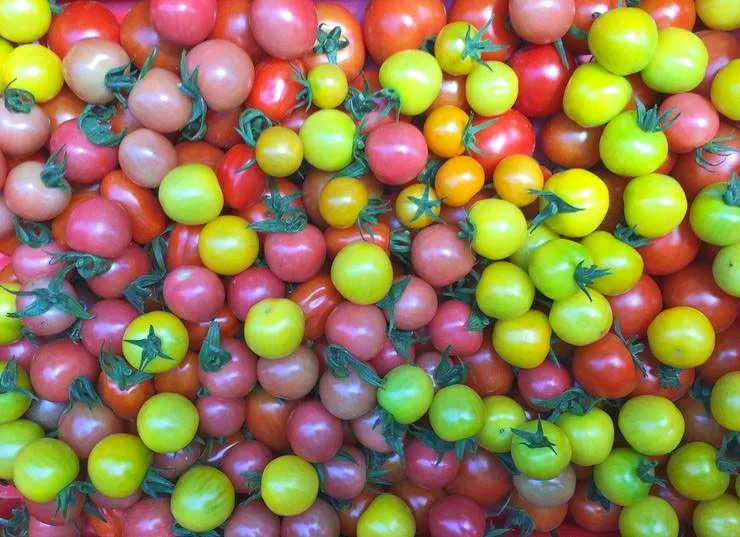
In the past we've written about brining pork chops, which is a great way to prepare chops for the grill or frying pan.  Here's a few more ideas on how to enjoy JSF pasture-raised pork chops in concert with sweet fall root veggies and apples. 

Pork Chops in a Pan

Ingredients:

apple.jpg
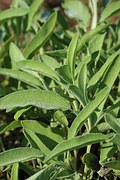
  • black pepper and herbs of your choice (sage is my favorite to pair with pork)
  • garlic chopped fine
  • onions chopped coarse
  • root vegetables of your choice, chopped in chunks  (we like carrots and parsnips)
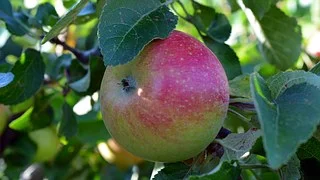
  • tart apple (like McIntosh or Cortland), chopped 

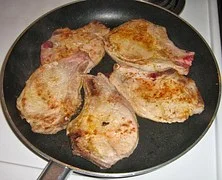
Heat a cast iron skillet or similar type pan over medium heat.  Rub the chops with pepper, herbs and garlic. Once pan is hot, place chops in pan and brown on each side for a few minutes. Add chopped onions to saute in the pork fat.  Once onions are about half done turn heat to medium/low and add a very small amount of water, broth, or cider to the pan, the quickly throw in the chopped root veggies and apple and cover.  Allow to cook covered on medium/low heat about 5 minutes.  Stir once and flip the chops over and recover to cook another 3 to 5 minutes, until veggies are just barely soft and chops are cooked through. 
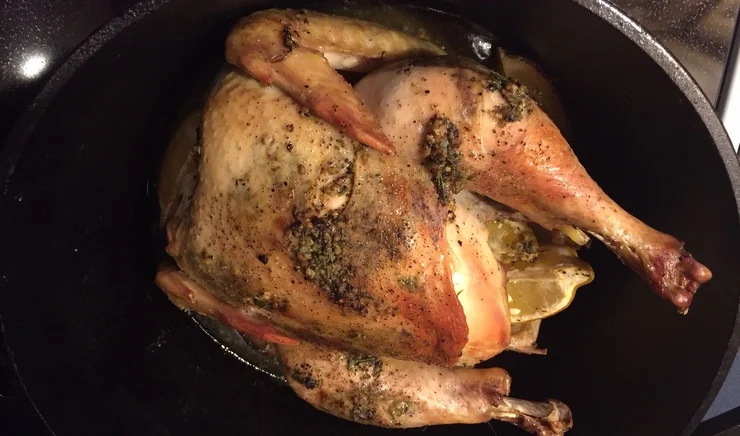
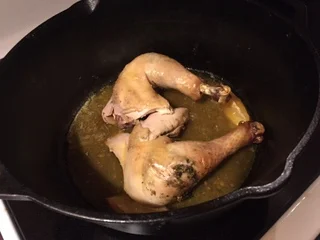
Braised Pork Chops

Pork blade chops and rib chops are best suited for this braising recipe.  Brown the chops as in the recipe above, then put them in a roasting pan with chopped onions, roots veggies, and apples. Add cider or broth to pan until liquid is about half way up the chops.  Cover pan with foil and put it in a preheated oven at 325 degrees for 30 to 40 minutes.  Chops are done when the meat falls off the bone.   This recipe works for a pork roast as well, just allow for a longer cooking time. Serve with mashed potatoes or roasted fingerling potatoes. Yum!

Comment

Comment

Cool Nights and French Onion Soup

Cool nights are on their way, nudging us with a bit of urgency to get in the fall harvest.  When we get home with the sun already set and the temperature dropping we almost instinctively think of making SOUP! This week use the rich yellow onions in your share to make a classic French Onion Soup.  With a side of toast broiled with melted cheddar (or classically, gruyere) you can let the entire piece soak up the soup's brothy flavor. 

We harvested one of our best onion crops ever at JSF this fall and we're busy curing and cleaning them for a long winter's worth of cooking!

We harvested one of our best onion crops ever at JSF this fall and we're busy curing and cleaning them for a long winter's worth of cooking!

Recipe:

4 oz of butter (feel free to reduce this)
3 to 4 Yellow Onions
1 Head of Garlic
2 (or more) Sprigs of Thyme, Oregano, Tarragon, Bay Leaves, or Rosemary
1 tsp Flour (optional)
1 Pint Beef Broth
1 Pint Water
1 cup Red Wine
Salt and Pepper
1 Loaf of Bread
4 Slices of Cheese (Works great with Sweet Rowen cheddar)

Melt the butter in a the bottom of a large pot and add the chopped onions and garlic and a dash of salt. Add your herbs in a neat bundle, as you will be removing them later. Cook on low, covered, for 30 minutes until the onions are transluscent but not burnt. Remove the herbs. Add a teaspoon of flour and stir well, so there are no clumps.

Add your broth, water, wine, and allow to cook for 20 minutes.

This is a great chance to cover slices of bread with cheese, and toast them in a toaster oven or broil them in your oven.

When everything is ready, put the bread at the bottom of the bowl, and ladle the soup on top. Enjoy!

Comment

Ruby Red Beet Slaw with Red Shiso and Papalo

1 Comment

Ruby Red Beet Slaw with Red Shiso and Papalo

IMG_1266.JPG

It's time to use some obscure herbs for the U-Pick garden! We grow them because they're delicious, and now you can use this great recipe to familiarize yourself with them for the first time. Have you cooked with red shiso or papalo before? Tell us about it (in the comments) so we can share it with our community! 

Salad:
1 lb Beets
1 Head of Napa or Green Cabbage
1/4 of an Onion
3 Sprigs Papalo (or cilantro)
3 Sprigs Red Shiso (or basil)

Dressing:
1 Handful of Sesame Seeds
1/4 Cup Sesame Oil
1/4 Cup Apple Cider Vinegar
1/4 Cup Soy Sauce
1 TBSP Maple Syrup
1 tsp Sriracha or other Hot Sauce

Peel your raw beets, and then grate or food procees them. Sprinkle salt, and set aside until the dressing is mixed up.

In a bowl, whisk together the sesame oil, sesame seeds, vinegar, soy sauce, maple syrup, and sriracha. Chop your herbs and add to the dressing. Pour the dressing over the grated veggies, stir well, and refrigerate for at least 30 minutes. For best flavor, allow the salad to sit overnight in the refrigerator.

1 Comment

How to Carve a Chicken

2 Comments

How to Carve a Chicken

There are countless ways to cook a chicken. Roast it, grill it, stuff it, brine it. But the best way to finish off any bird is by carving it simply and effectively. You only need 2 knives to do this correctly. A sharp, small, boning knife will be the best tool for the majority of this procedure. A sharp chef's knife is useful for slicing the breast.

1) Check Done-nessWhen the breast reads 165 degrees F, remove the legs. Take the bird onto a cutting board, and cut along the thigh where the leg connects to the bird. When you get down to the bone, cut the joint between the thigh and the body while…

1) Check Done-ness

When the breast reads 165 degrees F, remove the legs. Take the bird onto a cutting board, and cut along the thigh where the leg connects to the bird. When you get down to the bone, cut the joint between the thigh and the body while pulling back on the drumstick. Put the legs back into the cast iron/grill/oven/stovetop until they too read 165 degrees.

2. Allow to Cool. Let the bird rest at least until the legs are finished cooking. This will prevent the juices from leaving the bird, and will help keep the breast juicy. After at least 20 minutes, cut a straight line down the spine. You will be cut…

2. Allow to Cool. Let the bird rest at least until the legs are finished cooking. This will prevent the juices from leaving the bird, and will help keep the breast juicy. After at least 20 minutes, cut a straight line down the spine. You will be cutting one on each side. You will then move on to the wings to allow the breast to cool a bit.

3. Wings. Gently pull back the wings so you can see the seam where they connect to the body of the bird. Cut along that seam until you can see the bone. Then gently cut the joint between the bones while pulling back on the wing with your nondominant…

3. Wings. Gently pull back the wings so you can see the seam where they connect to the body of the bird. Cut along that seam until you can see the bone. Then gently cut the joint between the bones while pulling back on the wing with your nondominant hand.

4. The Breast. Cut along the side of the spine while pulling back with your fingers. Your goal is to do a combination of pulling and cutting to release the breast in one large piece. 

4. The Breast. Cut along the side of the spine while pulling back with your fingers. Your goal is to do a combination of pulling and cutting to release the breast in one large piece. 

Here you can see the right side of the bird, which has already been carved, and the left side of the bird, where the breast is almost fully off of the body.

Here you can see the right side of the bird, which has already been carved, and the left side of the bird, where the breast is almost fully off of the body.

5. Finish. Once you have cut the breast off of the bird, you will take a larger chef's knife to finish. Cut against the grain with even spaced slices. Once you have cut the breast, scoop the entire sliced piece onto your knife, and gently place it o…

5. Finish. Once you have cut the breast off of the bird, you will take a larger chef's knife to finish. Cut against the grain with even spaced slices. Once you have cut the breast, scoop the entire sliced piece onto your knife, and gently place it on your serving platter.

2 Comments

Cooking with the Crew: Herbed Potato Salad

Comment

Cooking with the Crew: Herbed Potato Salad

1 Pint of Potatoes
Half of one bunch of Radishes or Hakurei Turnips
1 Cucumber
Tops of Green Onions
1 Bunch (total) of fresh Parsley and/or Basil
1 TBSP Butter

Boil the potatoes (or grill them, roast them, whatever you like) until they are fork tender. You won't be cutting the potatoes again, so be sure to cut larger pieces into fractions for even cooking times. Chop the basil/parsley and green onion tops. While the potatoes cooked, drained, and still hot, add a tablespoon of butter and the herbs. Mix in, salt gently, set aside to cool.

Slice the radishes and cucumber as thinly as possible. Whisk together the ingredients in the simple dressing below, and allow the radishes and cucumber to marinade in it until the potatoes have cooled off. Wait until the potatoes have cooled completely, and stir everything together. Refrigerate for at least 30 minutes before serving.

Dressing:
1/3 cup Apple Cider Vinegar
1/4 cup Extra Virgin Olive Oil
1 TSP Stone Ground Mustard
1 TSP Honey or Maple Syrup
Salt and Pepper to taste

Comment

Comment

Cooking with Hannah: Braised Parsnips

My favorite way to cook parsnips is to braise them. A little balsamic vinegar balances the sweetness of parsnips pretty well. Nice side dish, along with some fresh JSF greens.

~ 2 lbs of parsnips, peeled, sliced thinly
1/2 cup chicken broth or vegetable stock
1/4 cup balsamic vinegar
1/8 cup olive oil
splash of soy sauce
spices! (I like adding aleppo. I bet it would be good with ginger. Or how 'bout GREEN SHALLOTS!? Whatever you like!)

Put it all in a heavy skillet or cast-iron pan. Bring the liquid to a boil, then simmer until parsnips are soft and liquid has made a yummy glaze.

-Hannah Harwood Doyle

Comment

Beet and Black Bean Veggie Burgers

Comment

Beet and Black Bean Veggie Burgers

Once upon a time I dreamed of constructing a veggie burger that was strong enough to withstand the grill without crumbling to pieces. Those days are over, now I commit to the stove top and focus on FLAVOR. 

24 ounces of cooked Black Beans (2 cans)
3 Medium Size Beets (or 1 gigantor)
1/4 Cup of Flax Seed
1 Egg
1 Bunch of Green Garlic
4 Carrots

Bring a pot of water to a boil and add the beets. If you have a large beet, cut it into pieces to reduce cooking time. No need to peel. Cook until fork tender, about 30 minutes. Pour the beets into a colander. Run the beets under a trickle of cool water and the skins should slide off in your hand with gentle pressure.

While the beets are boiling grate the carrots into a large bowl. Add finely chopped green garlic. Rinse the black beans well so they are as dry as possible. Add them to the bowl and mash with a potato masher. You can also just put all 3 of these ingredients in a food processor and press GO.

You can flavor this paste with whatever you like. This week I used the juice of 1 lemon, savory, oregano, basil, and salt. After stirring well this is a great time to take a break, and taste! It's a great dip for a chip or veggie!

Add the flax seed and one egg, stir well.

Dice your cooked, peeled beets into small pieces and stir into the bean mixture. At this point add just a small amount of flour (any grain flour will do, or more flax seed if you prefer), to thicken the paste. You want it to be sticky.

Prepare a bowl of half flour and half bread crumbs. (You can sub in any grain or seed that will fry in high heat). Roll the veggie burgers into balls, flatten them, and dip them on both sides into the flour mixture. Then cook on medium high heat with canola (or other high heat) oil. Cook about 2 minutes per side, until browned and crispy.

I ate mine over a bed of spinach and blue cheese.

Comment

Comment

Spinach Dip with Root Veggie Chips

We welcomed newcomer Ian Doig to our team just before his April birthday! In honor of his day the whole team made chips and dips to share. Here is our favorite Spring Greens treat.

Spinach Dip by Diane Abruzzini

1 lb Spinach, or other greens
2 Small Yellow Onions
1 Bunch of Green Garlic
1 Pint of Ricotta Cheese

Caramelize the yellow onions in a bit of butter or oil. The onions should cook down in size, brown slightly, but not char. This should take about 30 minutes. From there add the chopped green garlic and cook for another 5 minutes, until the garlic is soft and tender. At the last minute add the Spinach.

I like to leave this dip chunky. Slowly fold in the ricotta cheese with the spinach mixture. At this stage add any herbs, salt, pepper, or other flavorings you like. This week I added salt, rosemary, thyme and savory. Once the cheese is folded in you can spoon the mixture into a baking dish. Top with parmesean cheese and bake at 350 F for 15 minutes.

Root Veggie Chips

Root veggie chips don't have quite the crunch of a potato chip, but once you learn to let that go you'll find a deep love for veggie chips! If you use a mandolin slicer you will get the most crunch, but thinly sliced chips can burn quickly, so keep your eye on the oven!

Preheat the oven to 375 F

  • Slice any root veggie you like: beets, potatoes, parsnips...
  • Lay the slices in a colander or on a paper towel. Salt thoroughly and let sit for 15-20 minutes. This will help draw out excess moisture.
  • Spray a baking sheet with cooking spray or lightly oil it. Add the chips in a single layer and bake for about 20 minutes.
  • Continue this process until all of the chips are done

Try flavoring the chips with herbs or cayenne pepper before baking. Find the best flavor combination and let us know!

Comment